Virtual Makeup Try-On: Preview Makeup on Your Own Face
Preview makeup on your own face before applying it. See Glowmi’s before-and-after example, compare looks, and turn a preview into a real makeup plan.
On this page
The short answer
Virtual makeup try-on is a preview that helps you compare a look’s direction on a photo or camera view. Use it to choose a focus, color family, or intensity before applying real products. It cannot promise that a specific formula, texture, or finish will look exactly like the preview.
A useful outcome is a plan you can explain: softer lip, stronger upper-eye definition, or a warmer cheek. That remains useful even if you recreate the idea with products you already own.
Can I preview makeup on my own face?
Yes. A virtual makeup app can use your selfie to show a digital preview on your own face. Glowmi for iPhone builds personalized looks from your Beauty Profile and pairs each look with a preview and a step-by-step tutorial. Studio adds Makeup Try-On for exploring more looks.
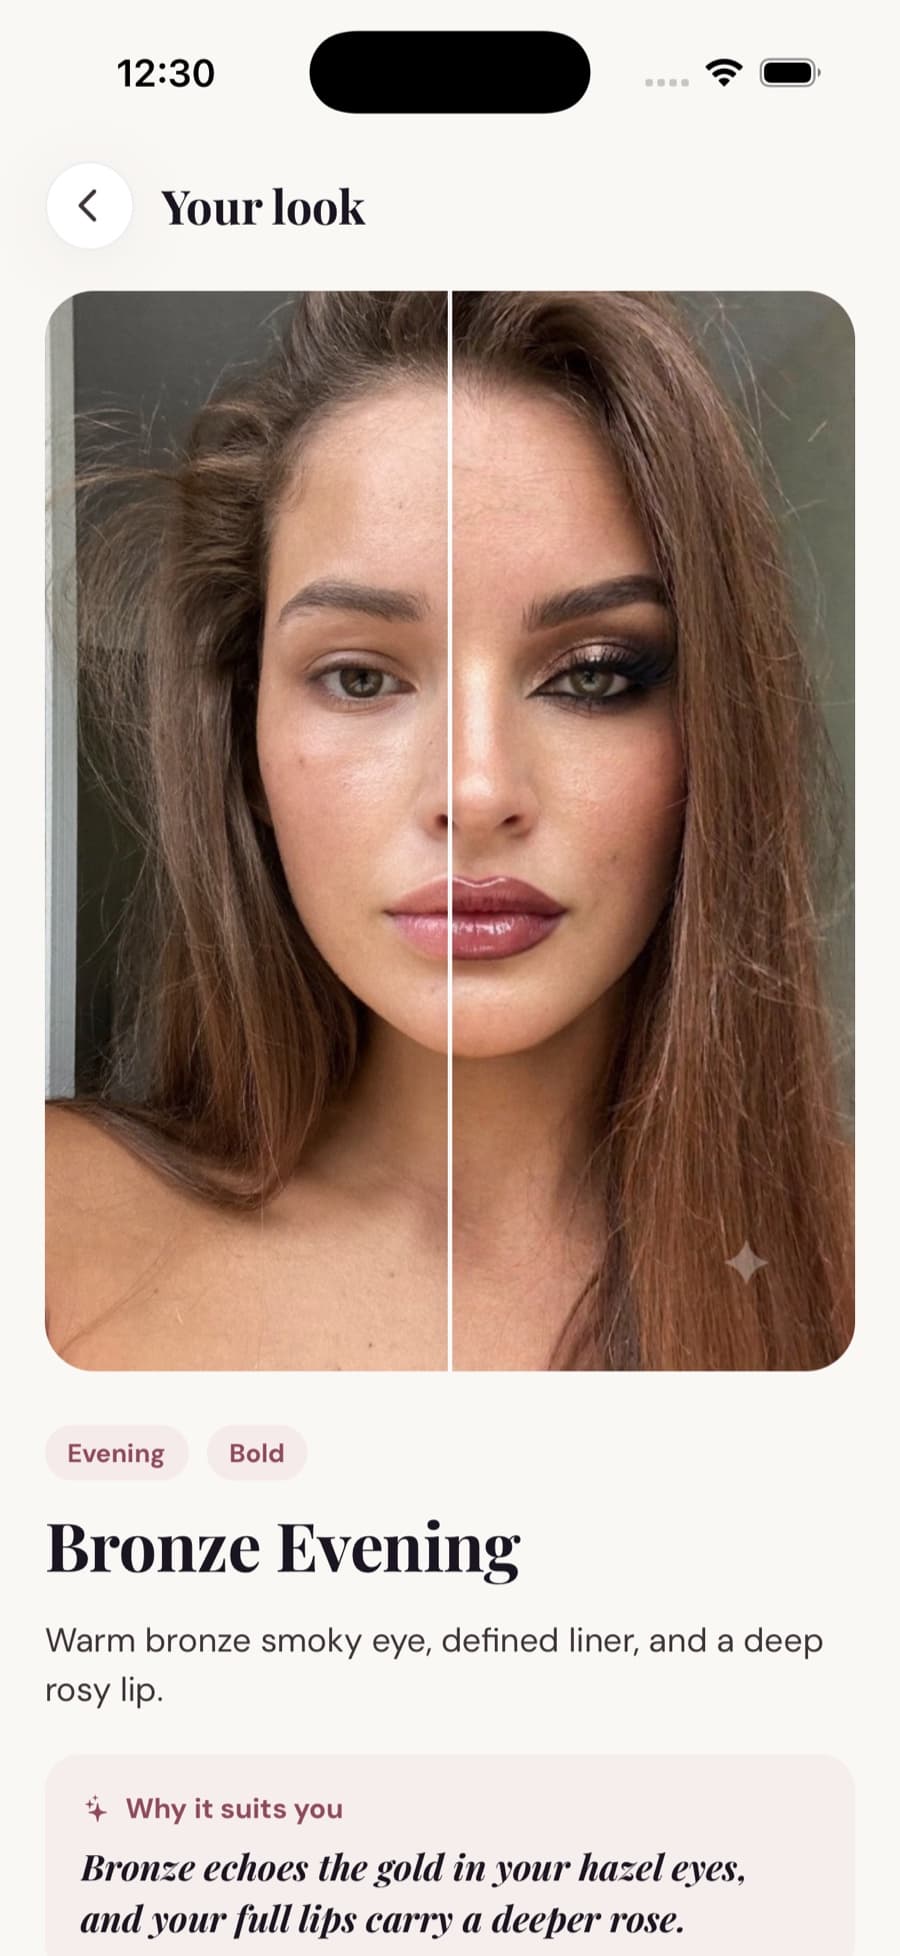
This Glowmi screenshot shows the Bronze Evening look: the original photo is on the left, and the generated makeup preview is on the right. Compare the bronze eye, defined liner, and deeper rosy lip as a style direction. The preview does not demonstrate how a real product wore or guarantee that a particular formula will produce the same result.
Decide what you are comparing
Start with an occasion and a constraint. You might want a quick daytime version using your current kit, or a more defined look for an evening. A dramatic preview is not automatically better than a quiet one; compare it with the result you actually want.
Keep the reference photo similar across previews. If the input changes angle or lighting, you are comparing both a new photograph and a new style. It becomes harder to know which part explains your preference.
Turn a preview into a real makeup plan
Choose a small number of directions and describe each in ordinary words before selecting a favorite.
- Use a clear, evenly lit reference without a beauty filter. Follow the tool’s capture instructions and check that important features are not obscured.
- Compare two or three looks using the same photo. Identify what changes: placement, intensity, color direction, or the focal point.
- Write a brief for the winner. For example, choose soft cheeks and a stronger lip, rather than trying to copy every pixel.
- Map the brief to your existing products. Check real shades on yourself; a digital color is not a product code.
- Apply a simple version, then compare it in the mirror. Keep the parts you like and adjust the rest before deciding whether you need anything new.
An illustrative day-to-evening comparison
Imagine two previews with similar eye-shadow colors: one uses a soft wash and the other adds a darker outer edge. If your goal is an evening change without replacing your kit, the useful difference is placement and depth. Try that one adjustment rather than buying a second collection.
For a lip-led preview, first see whether a product you own can approximate the color direction and opacity. A sheer layer and an opaque layer of the same lipstick may produce very different effects. Your finished version can follow the idea while retaining your own preferences.
Check what the preview cannot settle
A screen cannot let you feel a formula or show every effect of skin texture and wear. A preview also does not prove that two products share a shade across brands. Use the foundation matching method for a base rather than choosing it solely from a rendered image.
Photo color is another variable: a warm room or an edited reference can affect the apparent balance. If the real version looks different, compare in consistent light before concluding that your technique failed. Our lighting guide helps separate those questions.
Close the loop with the finished look
Save the preview as a planning reference and the real application as a separate result. Note which parts translated well. For example: “Keep the lip direction; reduce the lower-eye intensity for my daytime version.” This is an example note rather than a prescribed result.
Use the finished-look feedback method to choose one refinement. Then save the real products and steps together so a successful experiment becomes a look you can recreate.
Where Glowmi’s previews fit in
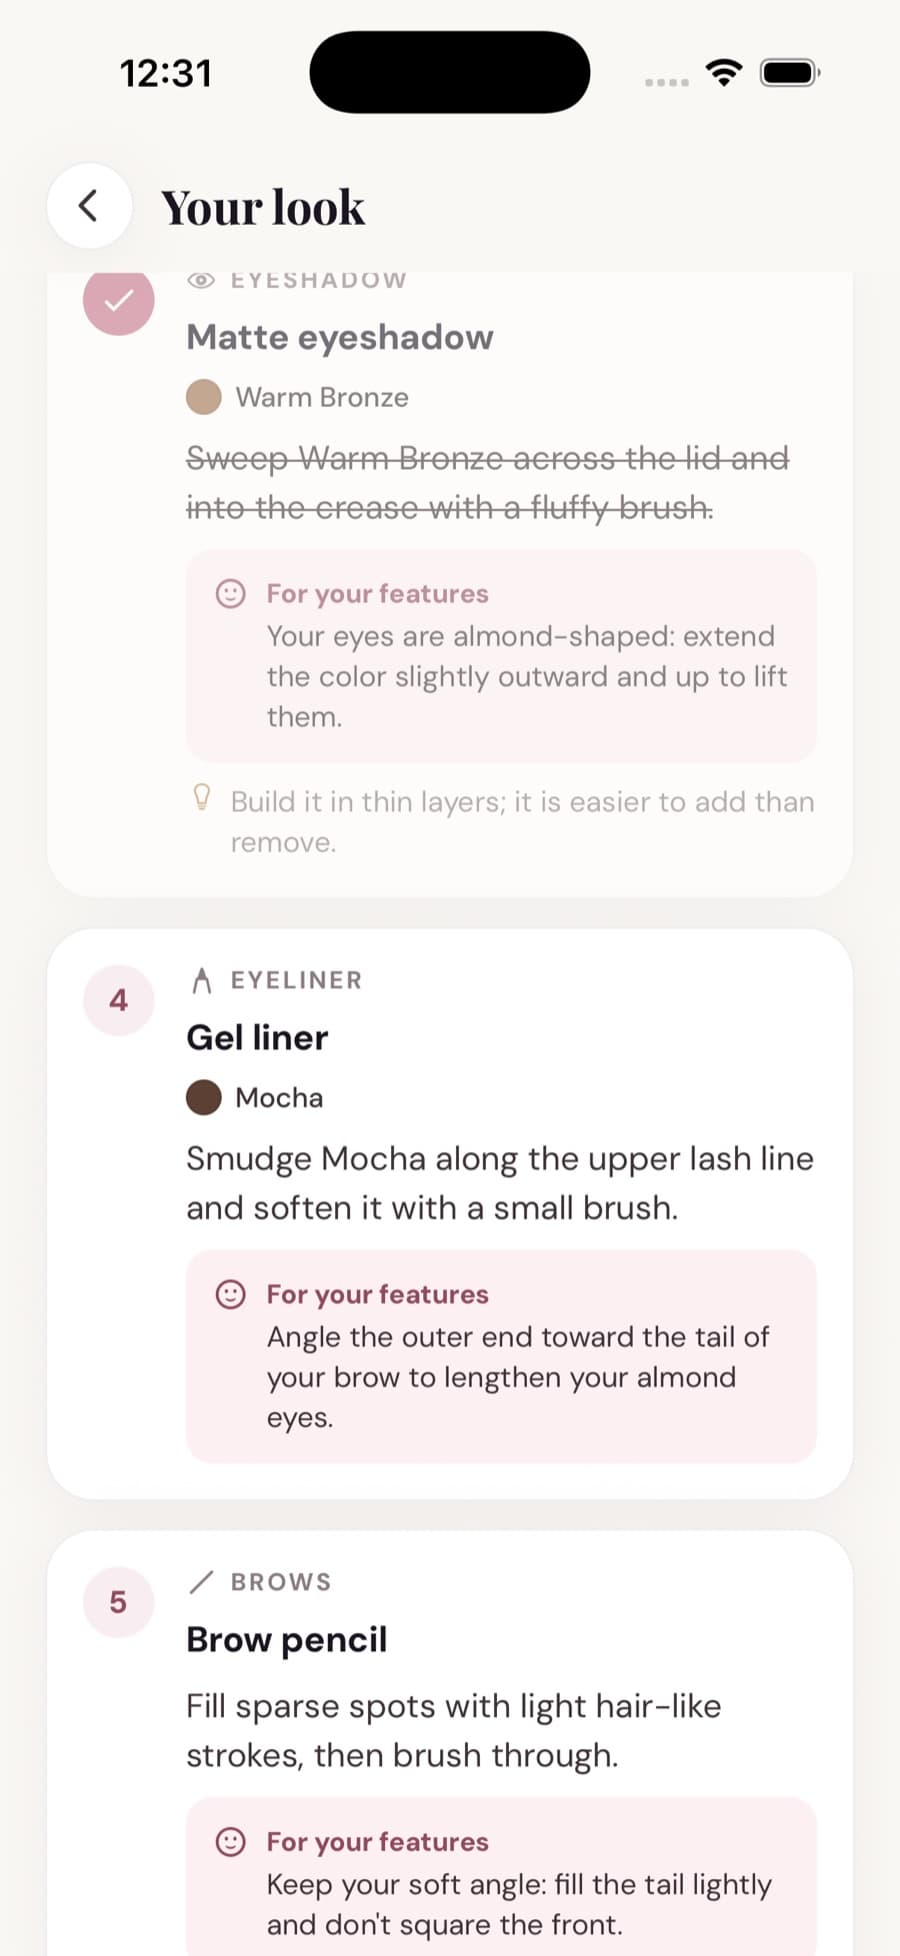
After choosing a preview, use its tutorial to turn the idea into steps. In the example below, Glowmi names the eye shades and explains placement for the example profile’s almond-shaped eyes. Adapt the amount and finish to the products you own. The personal makeup palette guide helps you choose supporting eye, lip, and cheek directions.
During onboarding you can see your season, a first shade, and your first look. Glowmi Pro unlocks the full experience afterward, with no free trial and fair daily and monthly AI usage limits. Glowmi is available on iOS; see the App Store for current plans.
Sources and further reading
Brand references describe their own methods and products. Our worked examples are illustrative, not records of product tests.
- Adobe: white balance, temperature, and tint
Background on how image color casts and color adjustments affect a photograph.
- How Glowmi’s face scan works
Our app’s features and limits; this is product information, not independent validation.
Keep reading
Makeup Look Feedback: How to Improve a Finished Look
Review a finished makeup look with a clear brief, consistent photo, and one useful adjustment. Includes a checklist and example feedback notes.
What Makeup Colors Suit Me? Build Your Personal Palette
Find eye, lip, and cheek colors you enjoy wearing together. See a Glowmi color-season example, compare real products, and build a personal makeup palette.
How AI Skin Analysis Works for Makeup Guidance
Prepare a useful selfie for AI makeup analysis, understand its limits, and test a suggested shade or technique in real life before relying on it.